Track your Projects and Experiments
This guide references a roam example graph that you can download and use as a starterpack for creating your own discourse graph
How to use Projects
A Project acts as a container for multiple experiments exploring a particular research question. You can think of it as a conceptual framework to structure a set of Discourse nodes related to a certain research goal.
Use Project pages to:
- Prioritize experiments
- Keep relevant resources at hand (links, etc.)
- Stay oriented toward and reflect on your progress toward your project target/question
The Project structure facilitates the creation of a traditional research narrative and aids in keeping track of all the moving parts that go into a scientific ms.
The Project page
You can see the layout of a Project Page in the Project/Horizontal Dashboard showcase in the roam template lab graph
To create a horizontal dashboard view of 2 or more blocks: place your cursor
in their parent (un-indented) block, press Ctrl-P to bring up the command
palette, select “change block view”, then press “h” for horizontal.
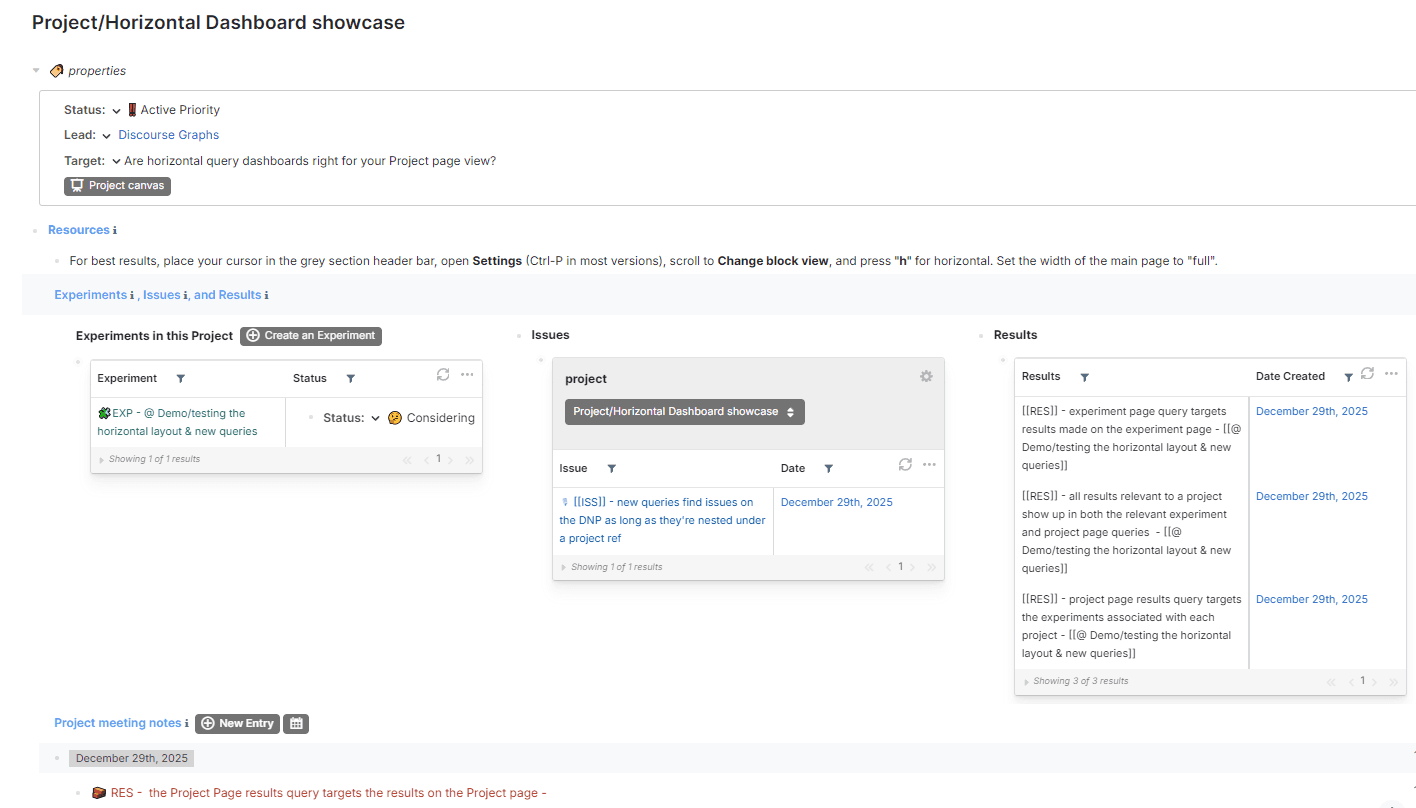
Example project page layout using the horizontal block view: click to embiggen
The Resources section can be used to organize protocols, references, datasets, reagent lists, etc. It’s also a convenient spot to pre-register your working Hypothesis.
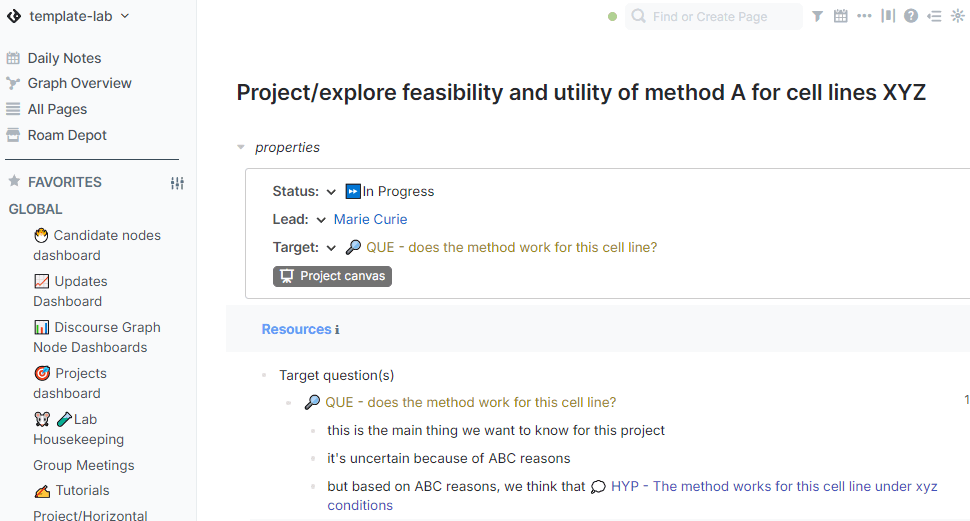
click to embiggen
The Experiments, Issues, & Results section can be used to keep track of multiple active experiments and filter by status, observations made from those experiments (Results), and ideas for future experiments (Issues). You can create new experiments using the Smartblock in this section.
Project Meeting Notes can be used to keep track of project updates and link project-relevant information from other parts of your graph. Like your Daily Notes Page, it has a Smartblock function for regular entries.
The Project Canvas Smartblock first creates and then navigates to a Canvas for visualizing the components of your project.
Creating a Project
Create a new Project by navigating to your home page and pressing the New Project Smartblock under “Projects & Experiments.”
You’ll be prompted to enter a Project Name, the current status of the Project, and the research Question the Project is meant to address.
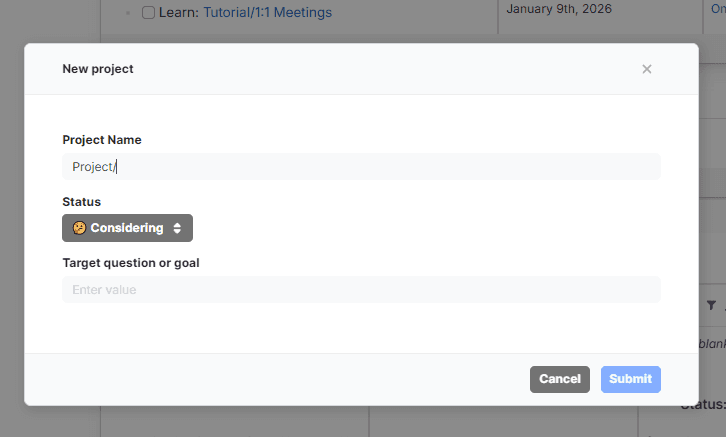
the “Create Project” modal
You can create a new project from anywhere in your graph by typing jj
followed by createproject (no spaces!)
Reviewing recent work done in a Project
The Experiments, Issues, & Results Dashboard provides a quick overview of experiments-in-progress, potential new experiments, and experimental results.
The Project Meeting Notes section can be used to record and review Project updates in chronological order. We recommend making liberal use of Roam’s block linking and embedding features to cross-link relevant data and observations and surface them to all users of a shared graph.
To find recently-created discourse nodes created during the course of a Project other than those on your Project Page dashboard, check out the Updates Dashboard (for nodes created in the past 30 days) and the Candidate nodes dashboard (for nodes that might be ready for formalization).
How to use Experiments
The Experiment is a container for your day-to-day work exploring a Hypothesis. It consists of an intervention and a metric used to track the result of that intervention. The Result is a statement of your observations regarding that intervention in terms of the appropriate metric.
Making an experiment page helps you track multiple days’ work and stay oriented towards and reflect on your progress towards your experiment target. Ideally the target is a Hypothesis you are testing, and the experiment page is a space to document and reflect on candidate results for that hypothesis.
A quick word on candidate nodes
- Candidate Results are preliminary observations attached to a particular experiment. They might be first impressions formed from a certain data artefact. Use this tag to mark candidate results: #res-candidate
- Candidate Questions are potential research questions to explore, of the scope to motivate an entire Project. #que-candidate
- Candidate Evidence are equivalent to candidate results. This term might be preferred by those using the original Discourse Graph Dialect to perform literature synthesis (as opposed to the equivalent Results Graph dialect). The “Evidence” term can also be used to disambiguate observations from the literature from Results from your own work. #evd-candidate
- Candidate Hypotheses are potential answers to the Question addressed by a particular project. They might live in the Resources field of a Project Page as you develop your expectations about the response to the intervention. #hyp-candidate
- Candidate Claims are equivalent to candidate hypotheses. This term might be preferred by those using the original Discourse Graph Dialect to perform literature synthesis (as opposed to the equivalent Results Graph dialect). The “Claim” term can also be used to disambiguate proposed answers to a Question sourced from the literature from hypotheses that you’ve developed in the course of your work. #clm-candidate
- Candidate Issues surface potential problems or future experiments. They may or may not be directly related to a particular Project. In a shared graph, a candidate issue can be a preliminary “Request for Experiments” that a lab group can refine together. #iss-candidate
When you’re more confident in an observation, you can use the “Create Discourse Node” popup to convert the candidate into a proper node. This will affect where it appears in queries and its appearance on your Project Canvas — and it will give you a warm sense of accomplishment. This works for all candidate node types.
Experiment page layout
You can see the layout and function of an experiment page here:
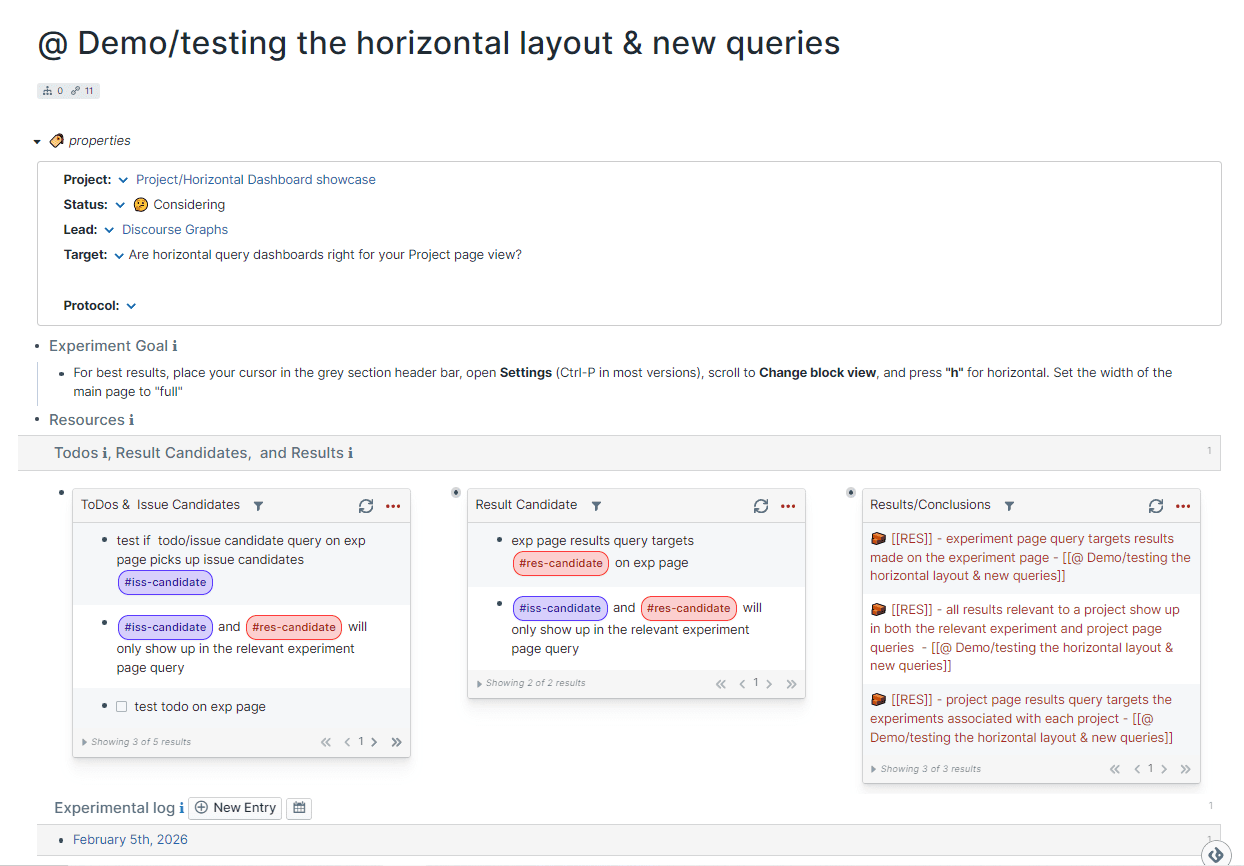
example experiment page
The experiment page highlights the Hypothesis being investigated and gathers ToDos, Issues, and Results related to the experimental goal in several query blocks. As you add results & candidate results and issues & candidate issues, they will be added to the query blocks on your Experiment page.
An Experimental Log, like a lab notebook/Daily Notes page, can be used to organize actions and observations by date.
Creating an Experiment
You can create an experiment using the New Experiment Smartblocks on your Home Page or Project Page.
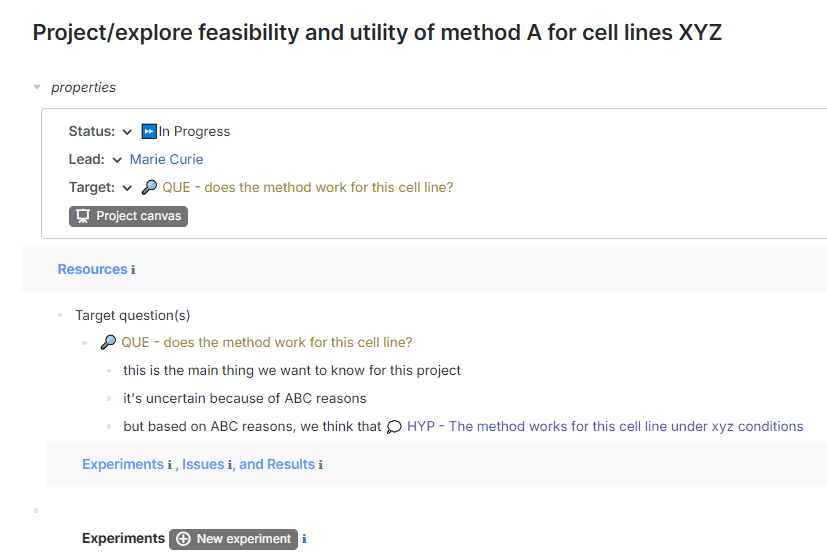
Creating a new Experiment from a Project page
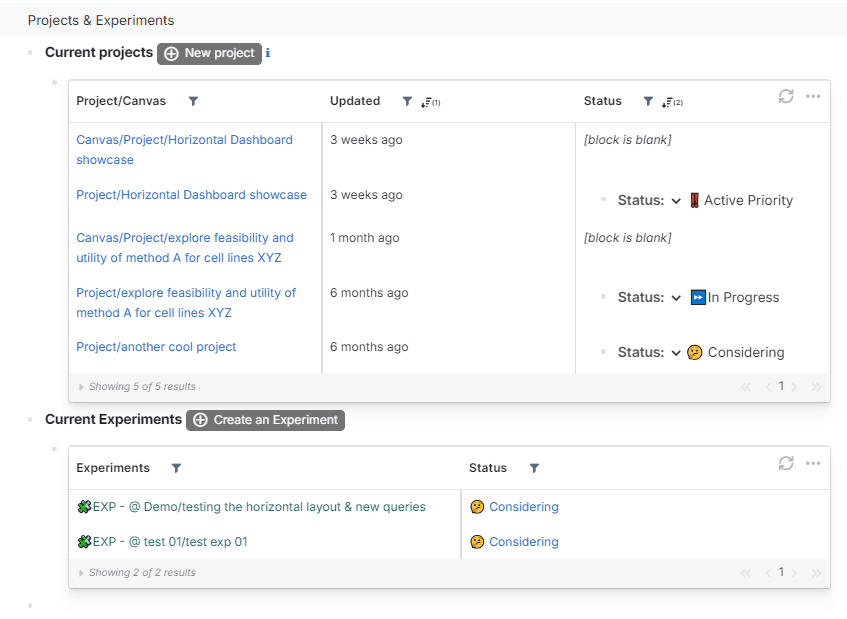
Creating a new Experiment from the home page
You can also create a new experiment from anywhere in your graph by typing jj add experiment page template, or by typing jj and selecting “Create Experiment Page” from the dropdown menu in the modal.
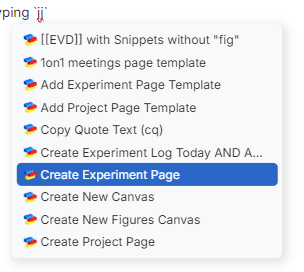
Creating a new Experiment from the smartblock hotkey menu
You’ll be prompted for several attributes relevant to the experiment: experiment type, title, model organism, question addressed, and project. Any fields irrelevant to your experiment can be left blank.
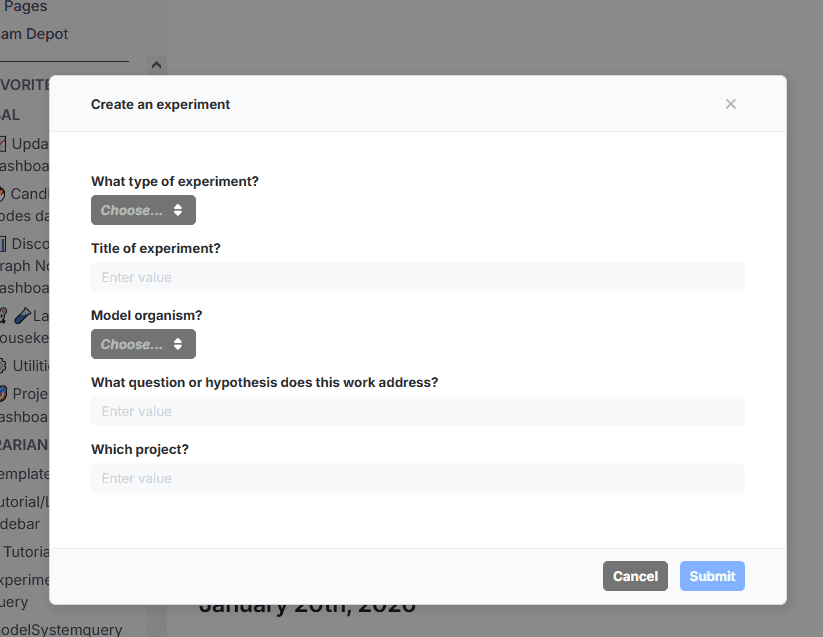
The “create experiment” modal
If you’re using the template graph, the inputs for Model Organism and Experiment Type can be adjusted on your Lab Housekeeping page. Editing the lists under “Model organisms/systems” and “Type of Experiment” will change the dropdowns in the “Create Experiment” window.
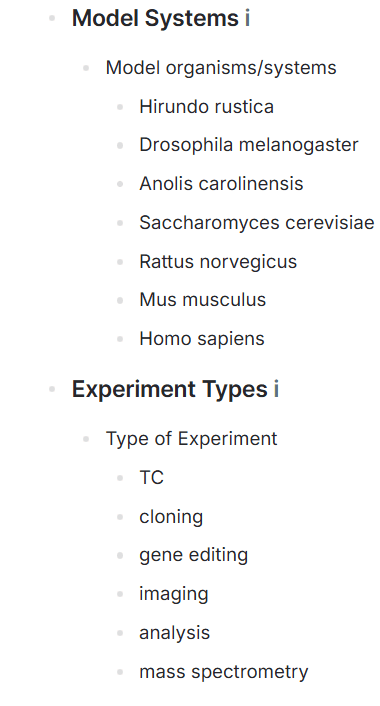
The Experiment options menu
Logging your observations
The Experimental log can be used as a complement or replacement for your lab notebook.
In your Experiment page, click “New Entry” to log today’s notes. You can alternatively click the calendar icon to insert notes for another date. These notes should be scrapbook-style: messy notes to self, links, screenshots, etc.
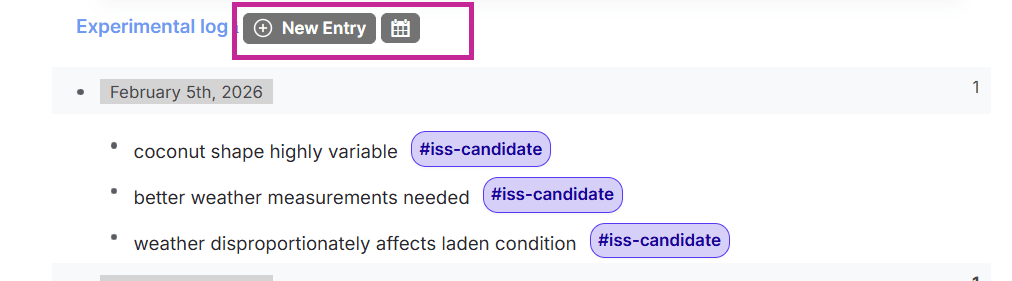
Creating a log entry
The same entry will show up on your Home page; you can edit in either place
You can add images by dragging them onto the page, copy/pasting, or typing /image to summon the image upload menu.
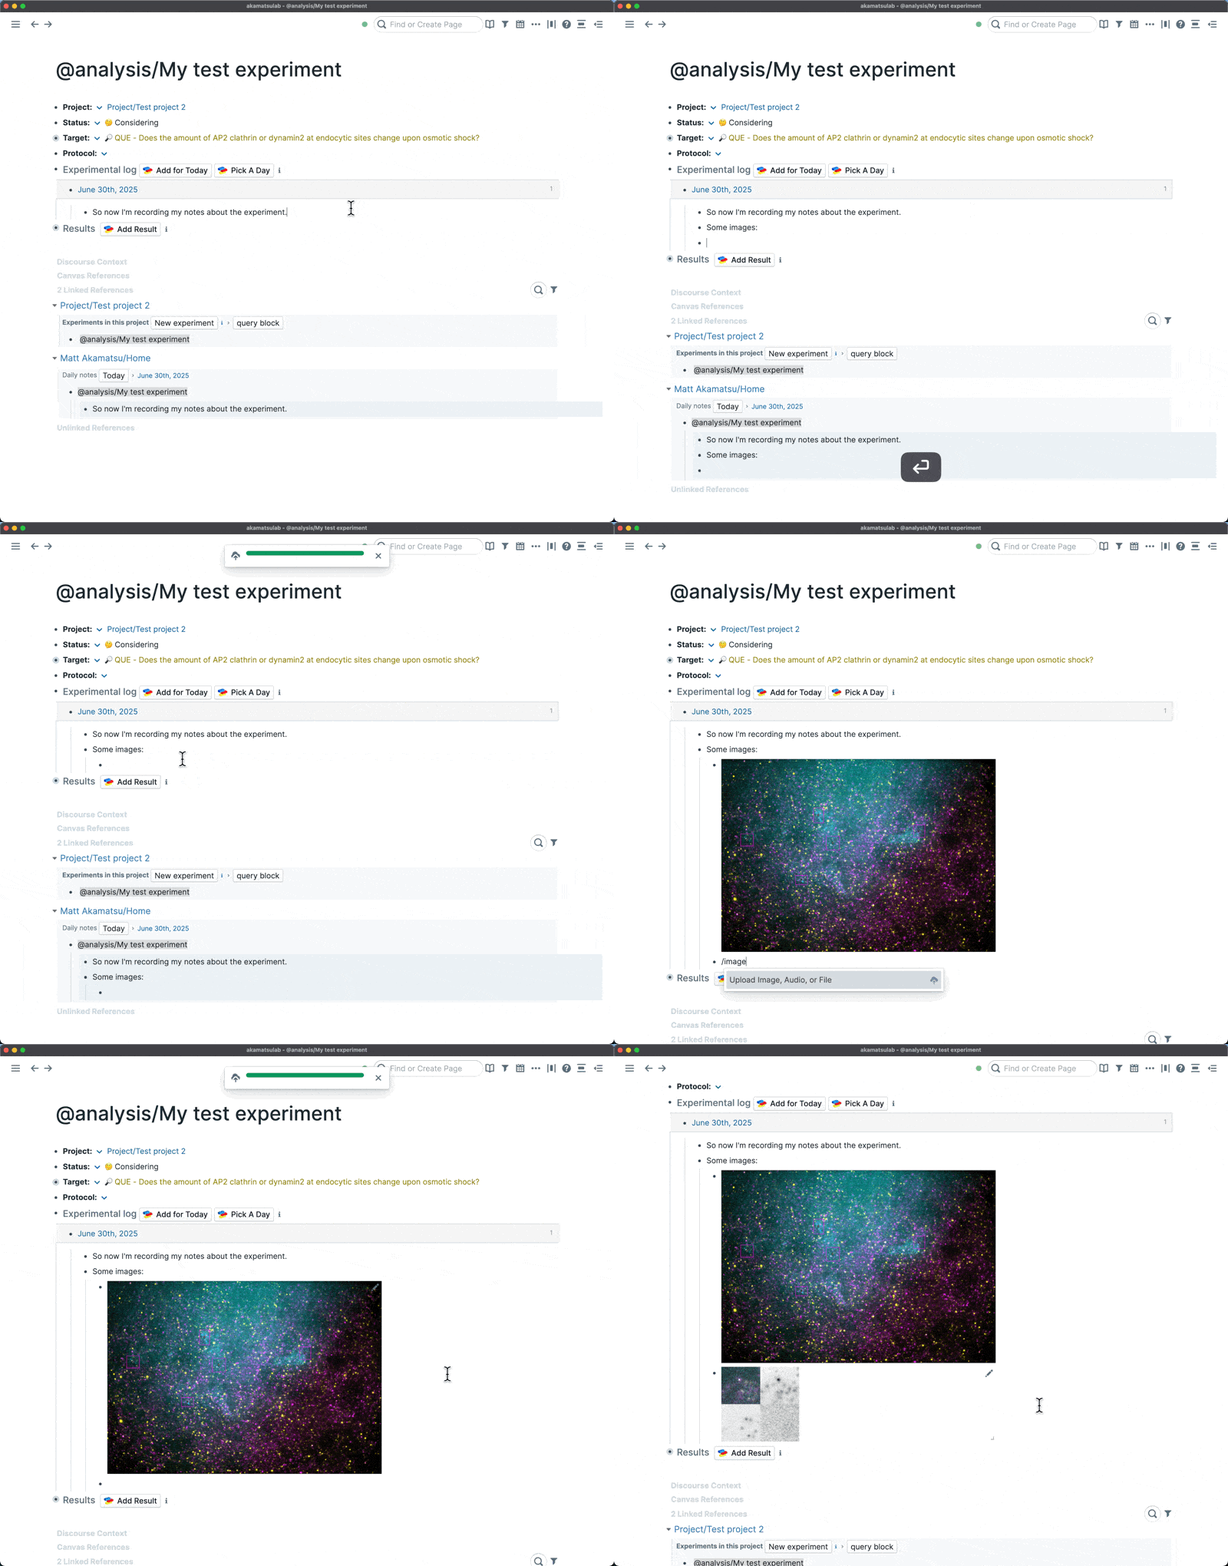
Adding images by drag-&-drop and from the image upload menu
Mark a promising plot or observation as a candidate result by typing \ to summon the candidate node menu and selecting res-candidate. You can use this same menu to note fledgling claims, hypotheses, and issues as well. You can revisit these nodes later for review.
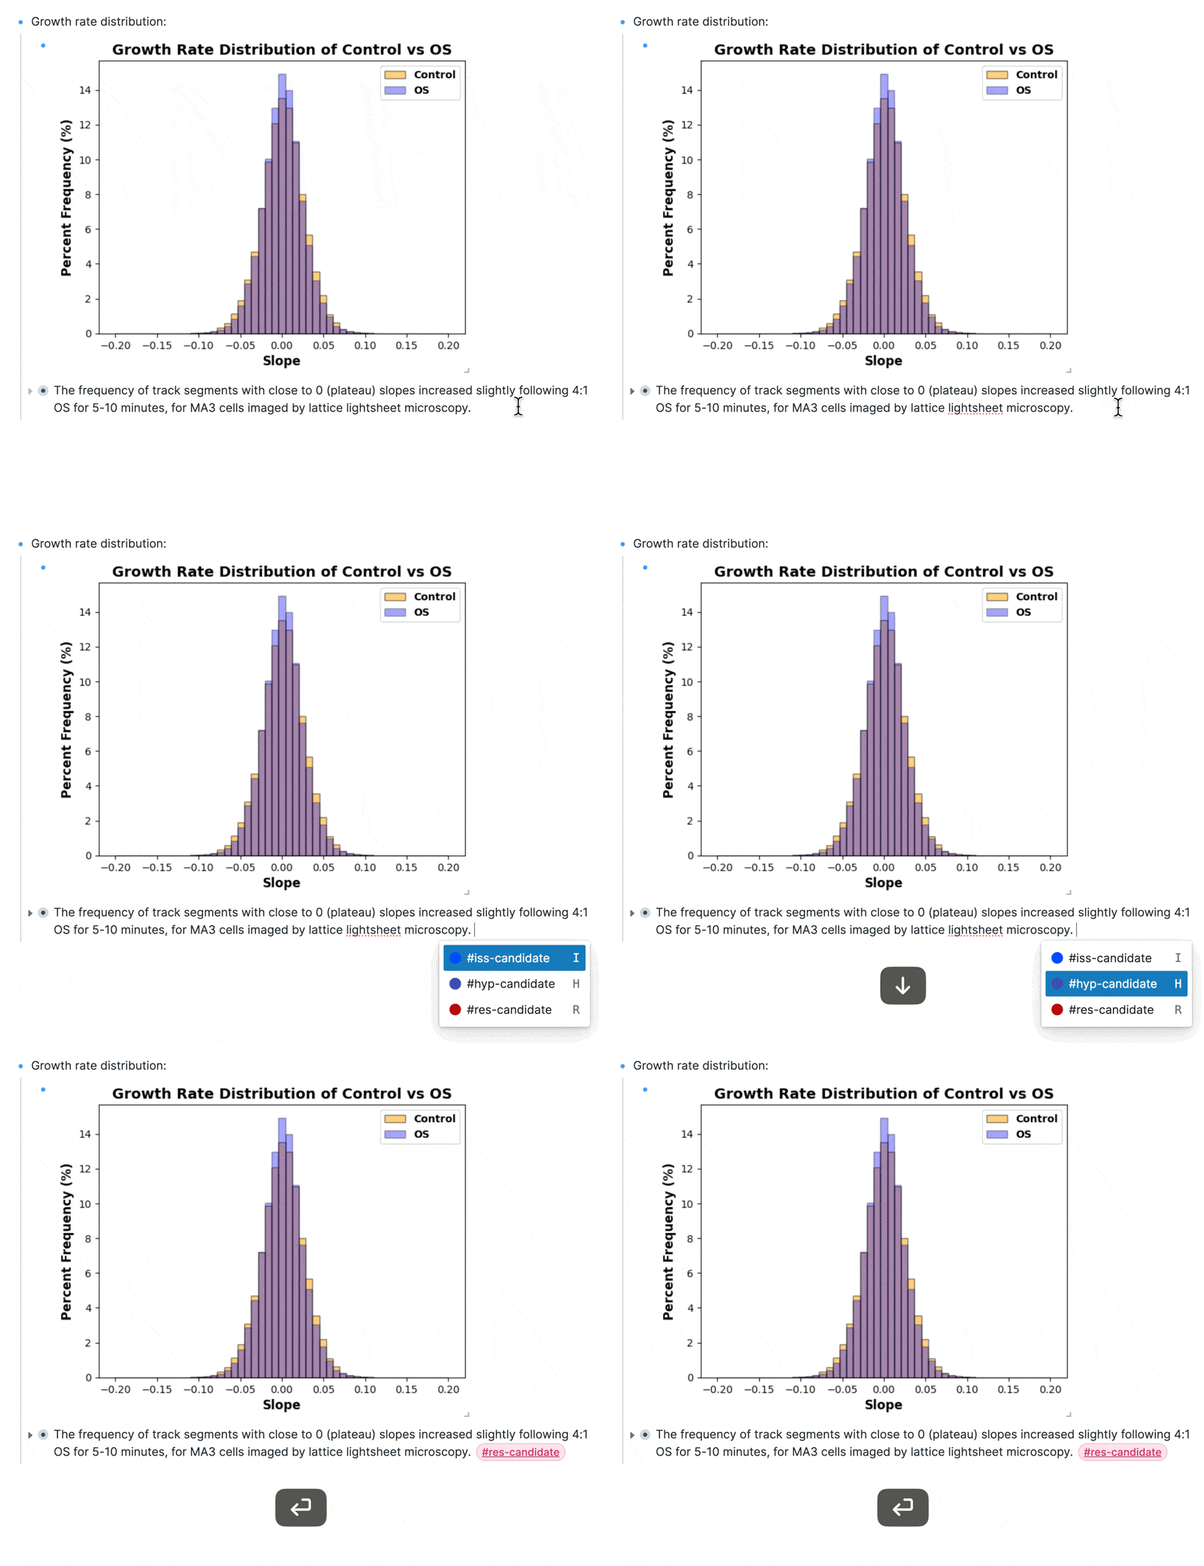
Marking candidate nodes using the \ menu
You can also mark important images or plots as candidate nodes by clicking the Add Node Tag icon in the bottom right corner and selecting the correct tag from the dropdown menu.
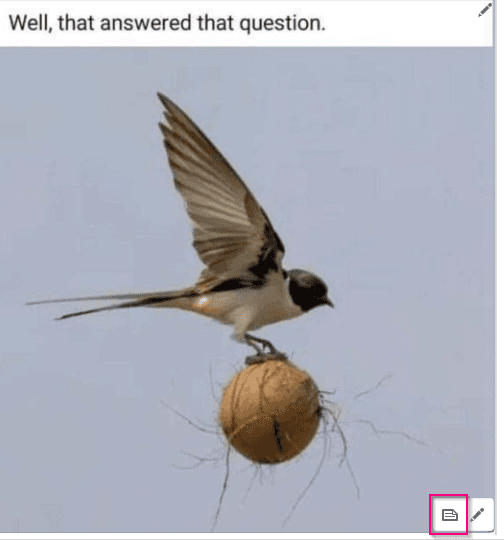
The Add Node Tag icon
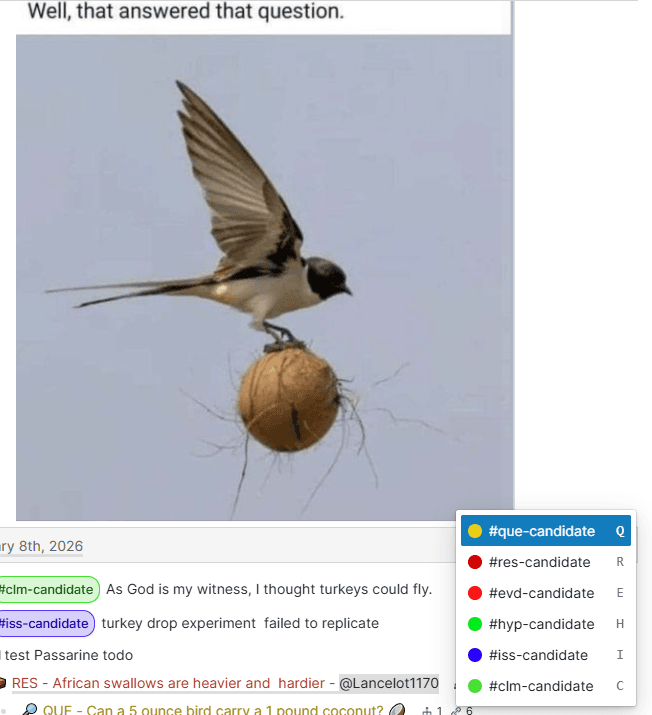
Opening the node tag menu
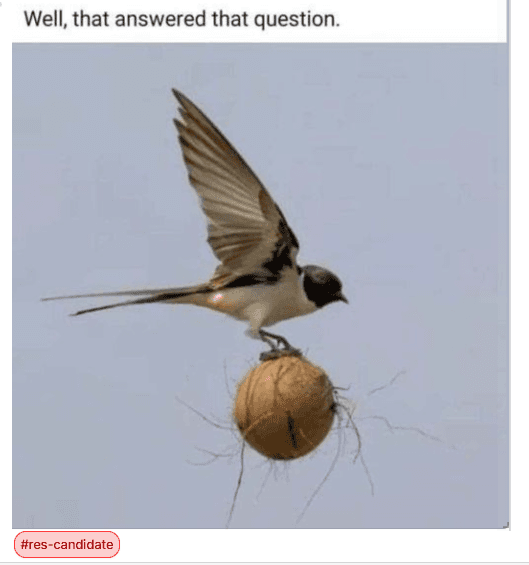
Tagging an image as a Result
You can use the candidate node menu the same way to mark issue candidates: possible future analyses or experiments.
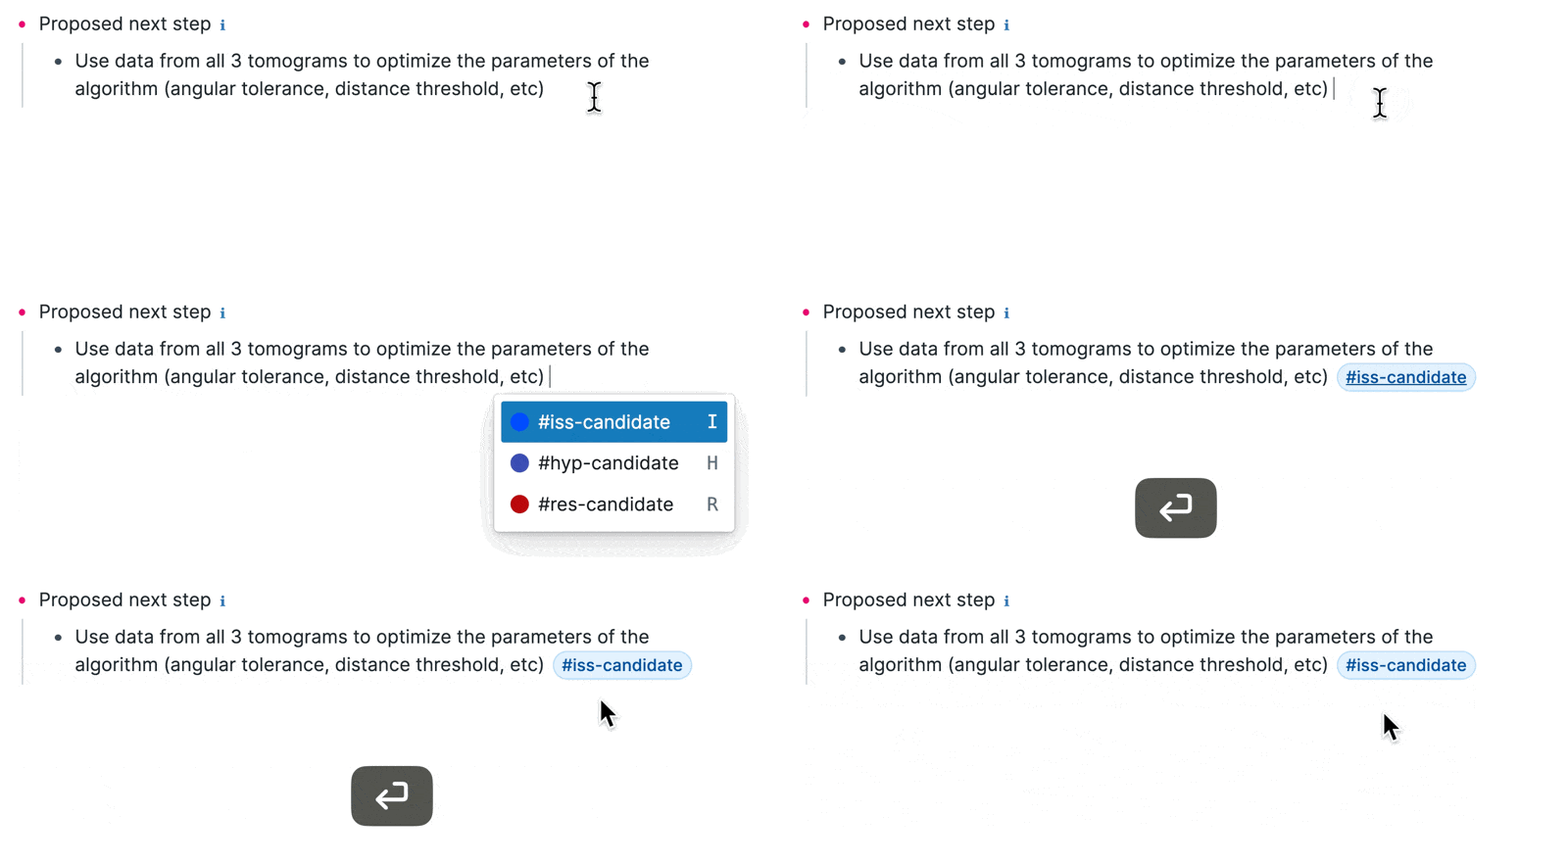
Marking an issue candidate — a request for a future experiment
For short tasks that don’t rise to the level of an experiment, you can create a TODO instead. Both TODOs and issue candidates will show up in the “todos” list for the experiment.
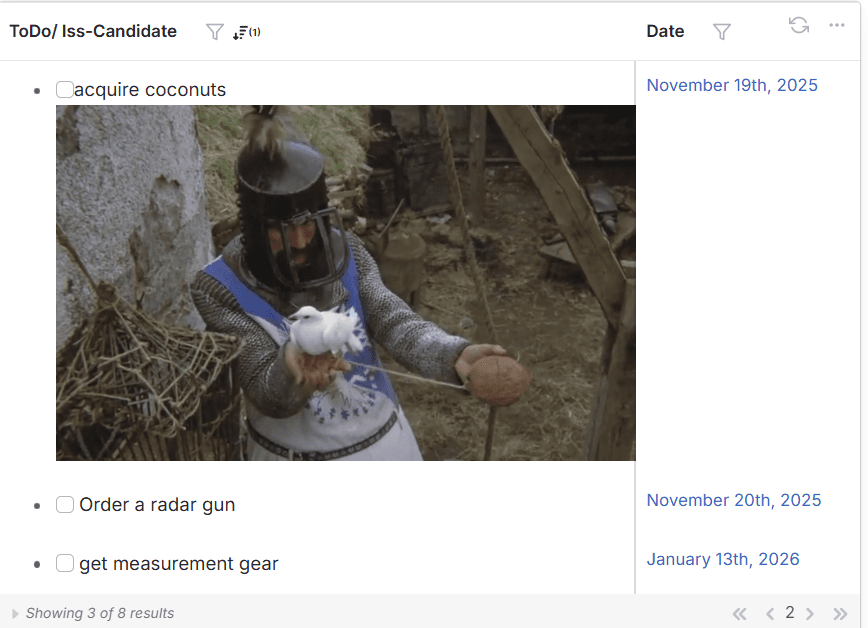
The TODO list
How to create an Issue
Often, while you’re writing up your work, you have an idea for another experiment (or simulation, or analysis) to do. It’s not clear if now is the right time, or if you are the right person. To save it for later, classify it as an Issue.
Highlight the text you wish to convert into an Issue, hit \, and type I to create an Issue. Set the Status and Issue type.
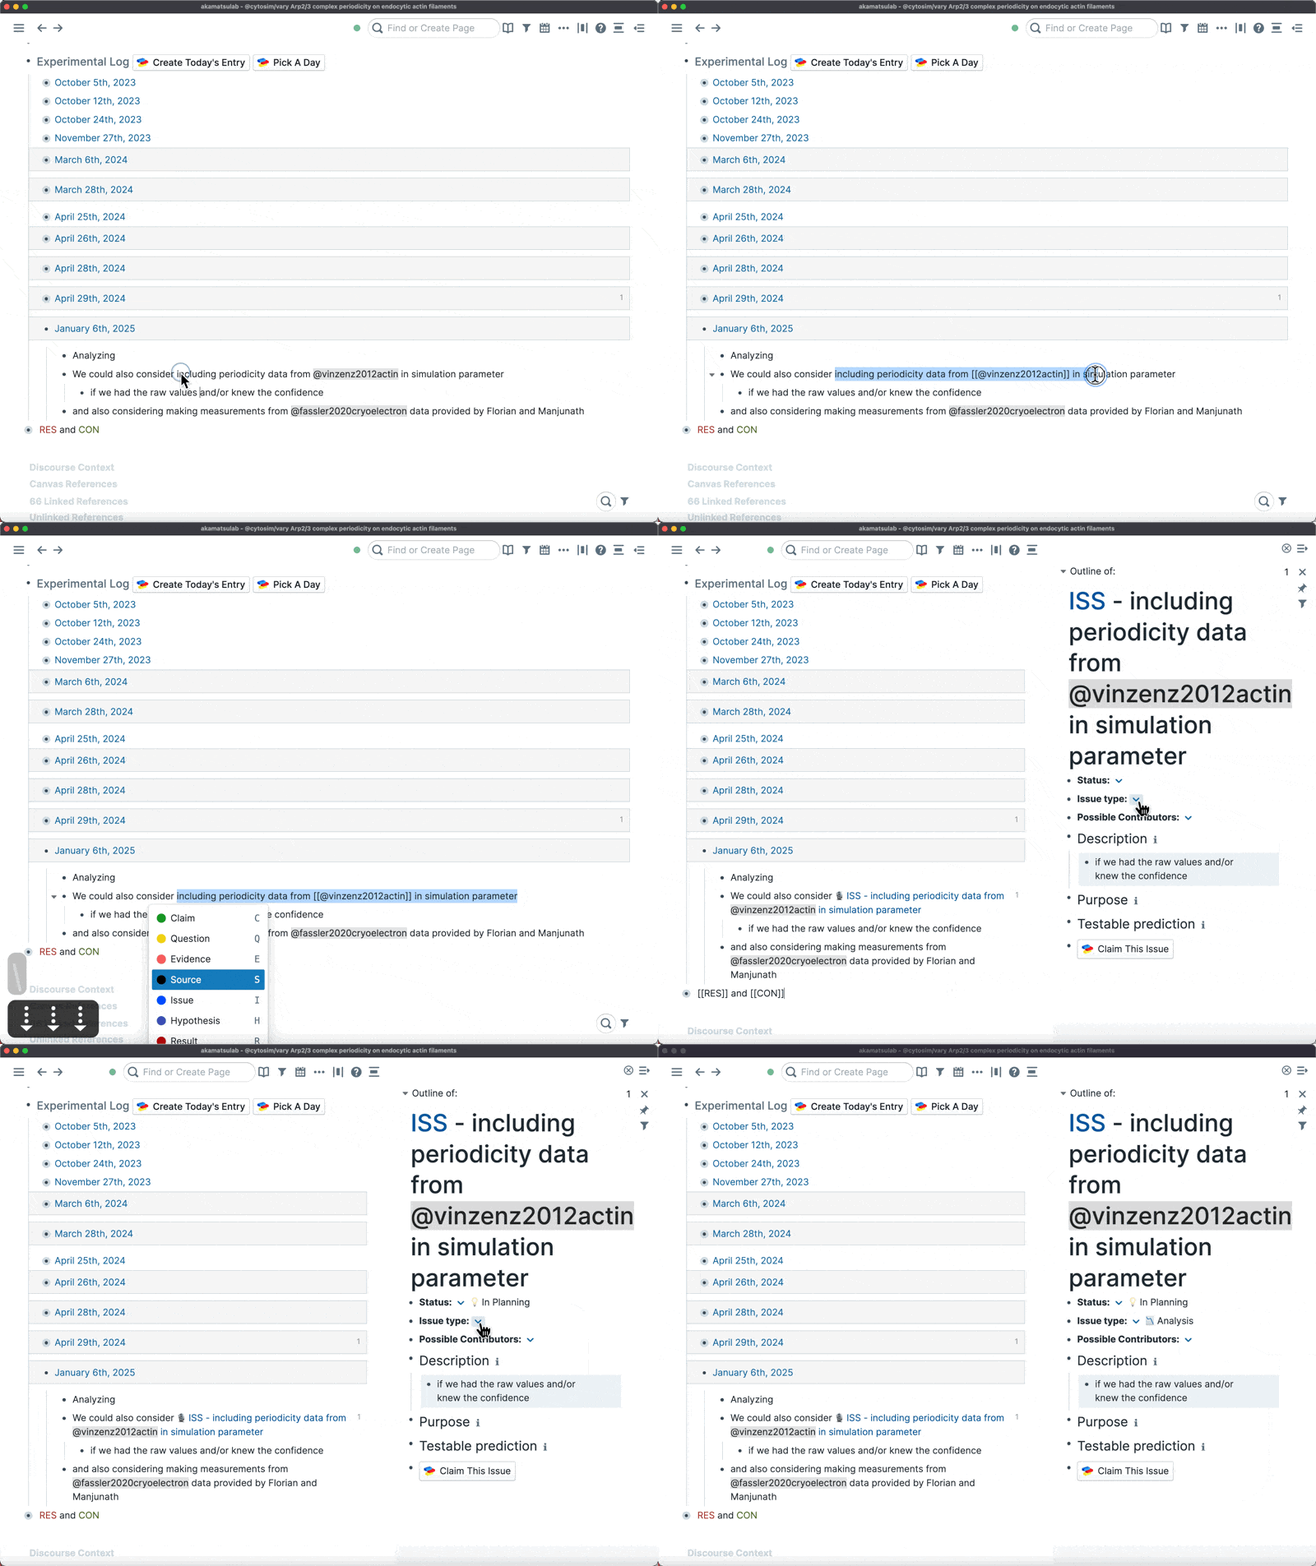
Highlighting text to create an Issue
Pressing capital I creates an Issue, while lowercase i converts the
selected text into an issue candidate instead
Any text nested under the text you select will show up in the Issue Description, even after the Issue has been created.
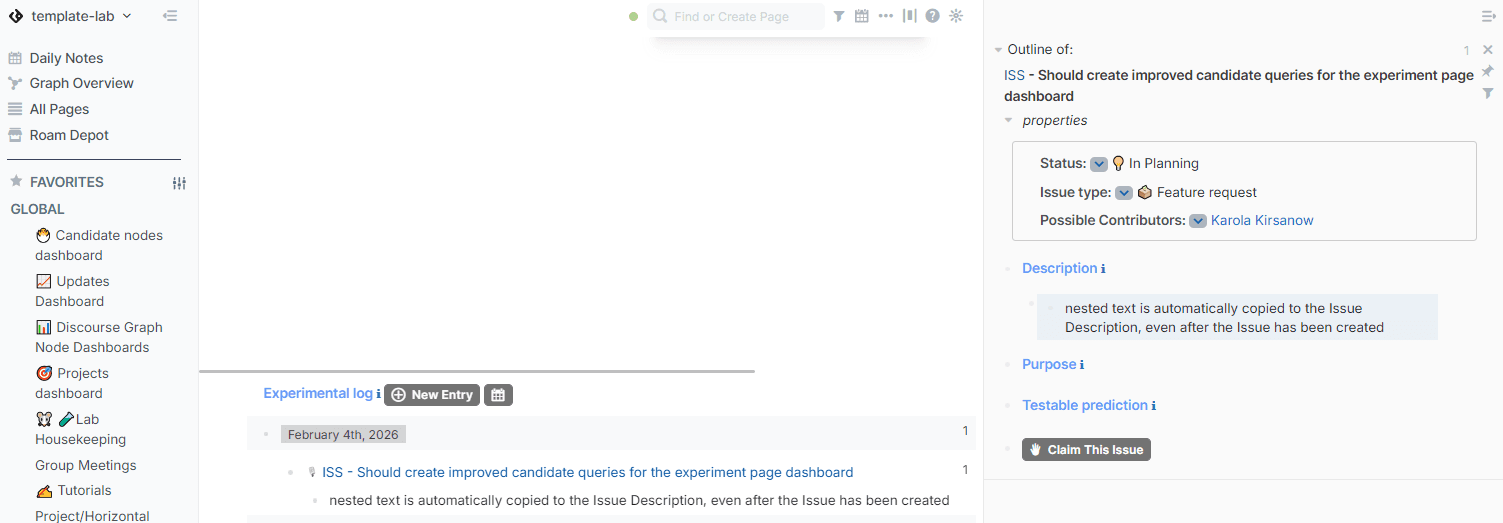
Viewing a newly-created issue in the sidebar
Alternatively, you can select the text with your mouse and use the node creation popup menu to create the Issue.
How to convert a candidate issue into an Issue
You may wish to use candidate nodes to keep track of potential issues to review at the end of your experimental workflow. These can then be discarded or converted into mature Issues.
To create an issue candidate, place your cursor at the end of the block you’d like to convert and hit \ to summon the candidate node creation menu.
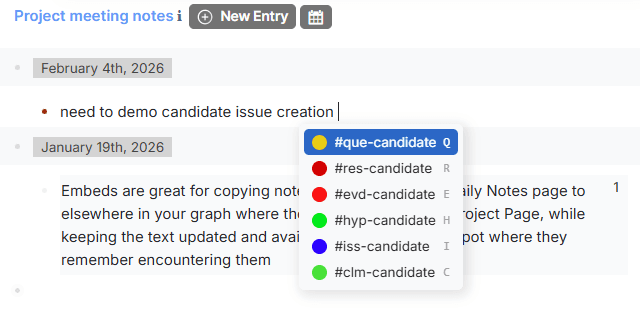
The candidate node menu
Once the candidate node has been created, hover over the node tag (#iss-candidate) to summon the node creation popup menu and create your new Issue.
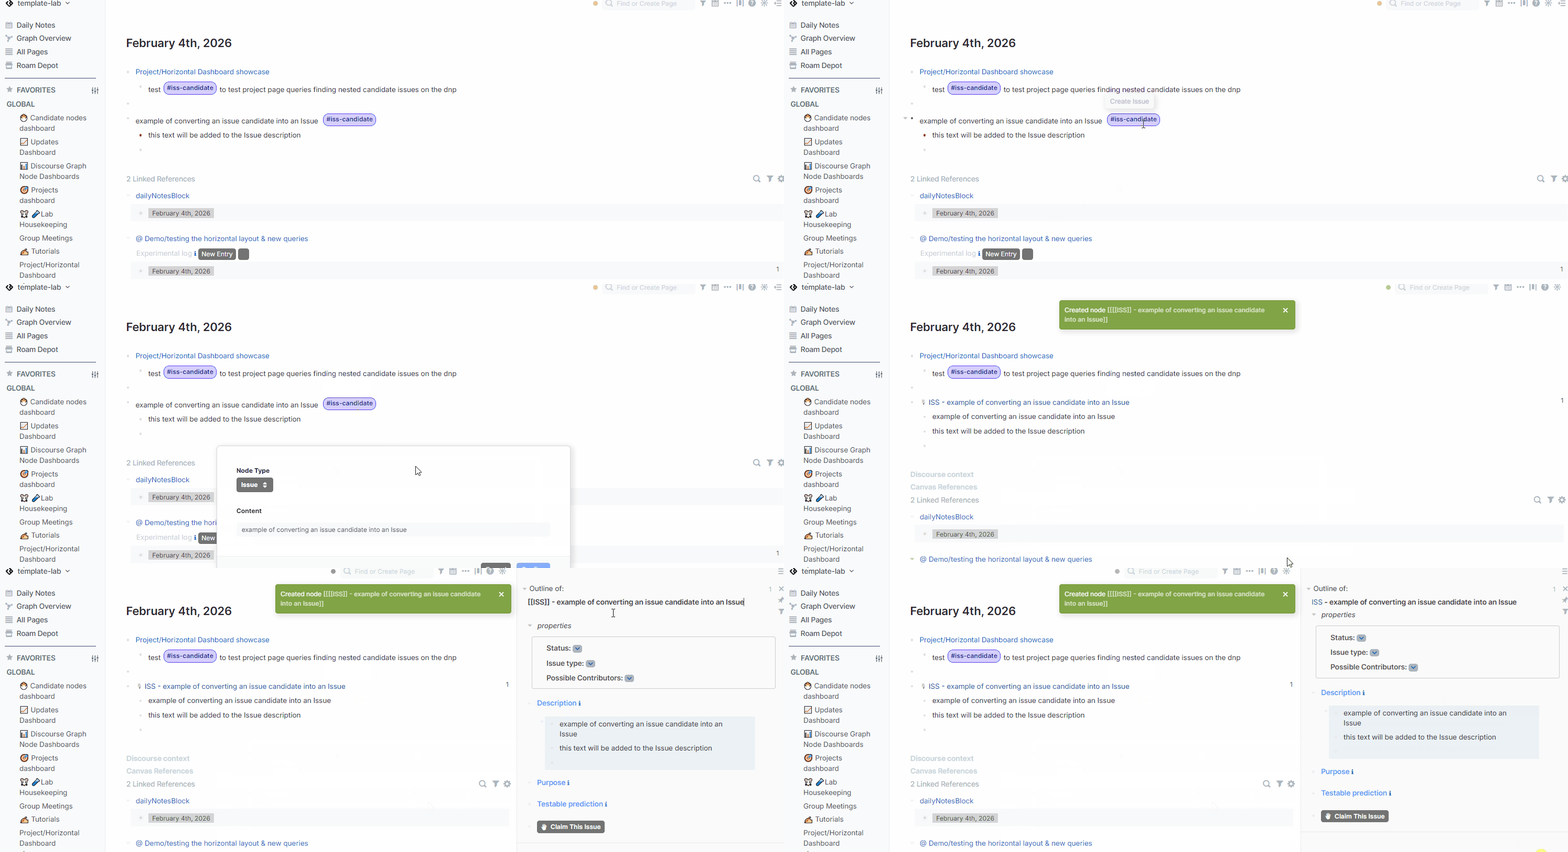
A new Issue
Querying existing Issues
You can use an Issue Query, like the one in this example graph , to review all of the Issues associated with a Project. This helps you find ideas for experiments, cross-reference your experimental ideas with existing issues, and claim the ones you’d like to work on later.
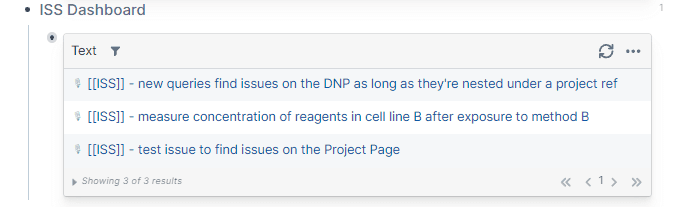
A query surfacing Issues in your graph
Claiming an Issue
If you’re working in a shared graph, claiming an issue alerts your colleagues that you intend to attack the problem identified in the issiue. It’s like calling “got it!” when fielding a fly ball.
If you’re working in a single-player graph, claiming an issue is more like formalizing a candidate node: you’ve decided that this problem is worth promoting to an Experiment and exploring further.

Claiming an Issue
Navigate to the Issue page you’d like to work on, click "Claim Issue", and complete the experiment setup form that pops up by adding a target question/hypothesis & project.
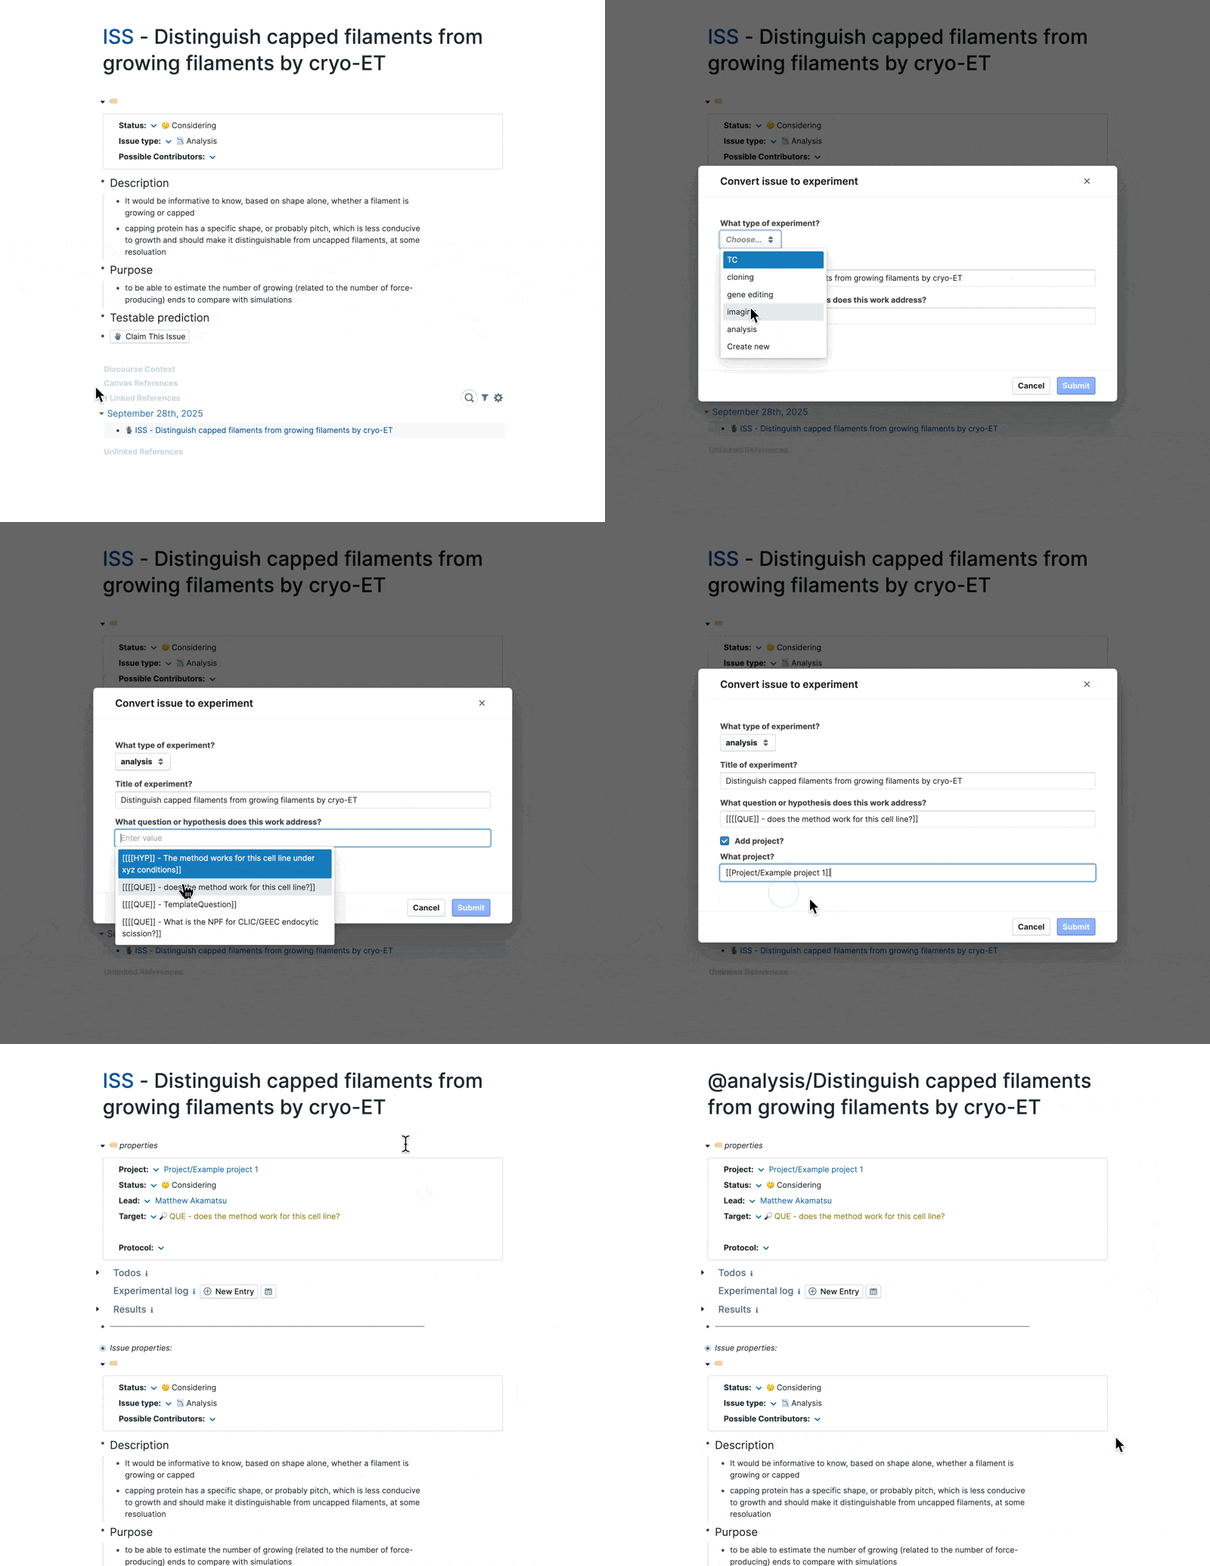
Claiming an Issue and setting up the resulting Experiment